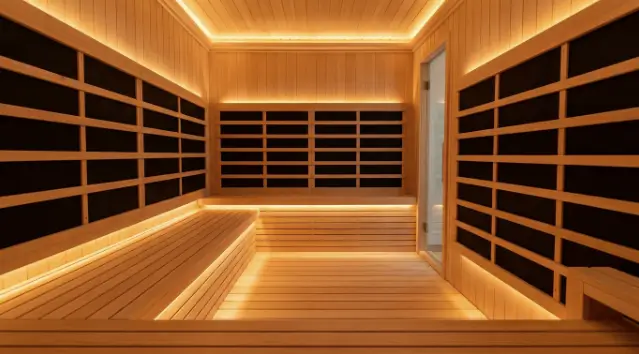
Installing an infrared sauna correctly comes down to three checks done before the cabin arrives: confirming the electrical circuit can handle the draw, preparing a level and moisture-tolerant floor, and leaving the manufacturer’s specified clearance around the cabinet for airflow and door swing. A one or two-person cabin on an existing 120-volt outlet can often be running within hours of delivery. A larger or full-spectrum cabin needing new wiring typically adds a full day of electrical work before first use.
Step One: Confirm the Electrical Circuit Can Handle the Load
Check the wattage listed on the cabin’s spec sheet against the circuit you plan to use. One and two-person cabins typically draw 1,500 watts or less, which fits comfortably on a standard 15 or 20-amp, 120-volt household circuit, provided nothing else demanding shares that circuit during a session. Three-person and larger cabins, and most full-spectrum models with additional near-infrared emitters, draw enough current to need a dedicated 20-amp circuit run directly from the panel, and some manufacturers specify 240 volts for their largest builds. Running a large cabin off a shared circuit with other appliances is the most common cause of tripped breakers during a session and, over months of that stress, of control boards failing early.
Step Two: Prepare a Suitable Floor Before the Cabin Arrives
Infrared cabins are lighter than traditional wood-and-stone saunas but still need a level, rigid surface to sit on. Tile, sealed concrete, and vinyl flooring all work without modification. A carpeted room needs a rigid pad underneath the cabin footprint so the panels do not shift or settle unevenly over repeated use, which can stress the tongue-and-groove panel joints over time. If the install is over a wood subfloor, confirm it is dry and structurally sound; a subfloor with any history of moisture damage should be addressed before the cabin goes in, since trapped moisture under a heated cabinet does not dry out on its own.
Step Three: Leave Clearance for Ventilation and the Door Swing
Manufacturers typically specify 2 to 3 inches of clearance behind and beside the cabinet so the carbon or ceramic panels can dissipate heat evenly rather than trapping it against a wall, which shortens panel life. Separately, plan for the door: a standard hinged door needs roughly 24 inches of clear floor space in front of the cabin for the swing, while a sliding or bi-fold door recovers most of that space in a tight room. Roof clearance matters too, since most cabins ship 6 feet 4 inches to 6 feet 8 inches tall on the outside and need a genuinely clear 7 feet once leveling feet and the roof cap are accounted for.
What About an Outdoor or Garage Installation?
A handful of manufacturers build weather-rated outdoor infrared cabins with sealed electrical components, treated exterior siding, and drainage built into the base. A standard indoor-rated cabin should never be installed outdoors, since its electrical components and interior wood are not built for direct weather exposure. An outdoor or unheated garage install also needs a weatherproof disconnect switch near the unit and a level, well-drained pad, ideally set slightly above surrounding grade so runoff does not pool against the cabinet base during storms.
What Ventilation Does an Infrared Cabin Actually Need?
Unlike a traditional sauna, an infrared cabin does not need a dedicated air intake and exhaust vent pair for combustion or steam, since there is no open heater element producing steam. Most cabins include a small roof or upper-wall vent to let excess humidity from the body escape during a session, and that vent should not be blocked by nearby shelving or a low ceiling. A cabin installed in a small, sealed closet without any airflow to the surrounding room tends to feel stuffier by the end of a session, even though the panels themselves run at a lower ambient temperature than a traditional heater.
What Permits or Inspections Might Be Required?
Requirements vary by city and county, so this is worth confirming locally rather than assuming a plug-in cabin is automatically exempt from any oversight. In many jurisdictions, a one or two-person cabin plugged into an existing, unmodified outlet does not trigger a permit requirement, since no new wiring is being installed. Adding a dedicated circuit, however, generally does require an electrical permit and a follow-up inspection, and skipping that step on a new circuit can create problems later, both for insurance purposes and for resale, if a future buyer’s inspector finds unpermitted wiring. A licensed electrician pulling the permit as part of the job is usually the simplest way to handle this, since it folds directly into the cost of the work rather than becoming a separate task for the homeowner to manage.
Ground-fault protection is also worth asking about specifically. Many local codes require GFCI protection on circuits serving a sauna, given the combination of electrical equipment and a room where humidity is elevated during use, even though an infrared cabin does not produce steam the way a traditional sauna does. An electrician familiar with sauna installs, rather than general residential wiring only, is more likely to flag this without being asked, which is one reason it is worth mentioning sauna use specifically when getting quotes rather than describing the job only as adding an outlet.
See also: The Importance of Networking in Business
What Does the Research Say About the Heat Exposure Infrared Delivers?
Most published sauna research studies traditional, higher-temperature Finnish-style sessions rather than the lower, 120 to 150 degree range typical of infrared cabins, so the electrical and clearance planning above matters independent of any specific health claim. A systematic review in Evidence-Based Complementary and Alternative Medicine summarized clinical effects of regular sauna bathing across multiple study designs. An older review in The American Journal of Medicine covered both benefits and known contraindications of sauna bathing more broadly, including cautions around unstable cardiovascular conditions. A physiological review in American Journal of Physiology – Regulatory, Integrative and Comparative Physiology examined how the body responds to heat exposure generally. None of these studies isolate infrared cabins specifically, so the associations they report should be treated as suggestive context, not a direct finding about any one installation.
Once the electrical and floor prep are confirmed, comparing cabin footprints and stated amperage across models makes it easier to plan the exact install; current listings are available where shoppers can view current pricing alongside each unit’s specifications.
Frequently Asked Questions
What electrical circuit does an infrared sauna need? Most one and two-person cabins run on a dedicated 15 or 20-amp, 120-volt circuit. Larger and full-spectrum cabins often need a dedicated 20-amp circuit or 240 volts.
What kind of floor does an infrared sauna need underneath it? A level, moisture-tolerant surface like tile, sealed concrete, or vinyl works as-is. Carpet needs a rigid pad, and any wood subfloor should be confirmed dry and sound first.
How much clearance does an infrared sauna need from the wall? Most manufacturers specify 2 to 3 inches on the back and sides, plus at least 24 inches in front of a hinged door for swing room.
Can you install an infrared sauna outdoors? Only a weather-rated outdoor model with sealed electrical components and treated siding. A standard indoor cabin should not be installed outside.
References
- Clinical Effects of Regular Dry Sauna Bathing: A Systematic Review, Evidence-Based Complementary and Alternative Medicine, 2018
- Benefits and risks of sauna bathing, The American Journal of Medicine, 2001
- Effects of heat and cold on health, with special reference to Finnish sauna bathing, American Journal of Physiology – Regulatory, Integrative and Comparative Physiology, 2018
By Renee Castellano